vscode를 이용해 개발을 하다 보면 내가 찾는 기능이 extension에 없는 경우가 종종 있다.
없으면 내가 만들면 되지 않을까 라는 생각에 이번에 extension을 만들어보기로 했다.
extension을 만들고 배포까지 하는 과정을 기록해두려고 한다.
1. 전제조건
전제조건은 java script를 다룰 줄 안다는 것 정도..?
하지만 몰라도 이번에 따라하면서 익히면 된다.
생각보다 허들이 낮기때문에 괜찮을 것 같다.
컴퓨터에 node.js가 깔려있어야 한다.
없다면 node.js를 깔아야되고 버전은 무조건 14이상으로 다운받아야한다.
참고로 내 node 버전은 14이다.

2. 코드작성
일련의 과정은 visualstudio 에서도 확인할 수 있다.
https://code.visualstudio.com/api/get-started/your-first-extension
Your First Extension
Create your first Visual Studio Code extension (plug-in) with a simple Hello World example.
code.visualstudio.com
하지만 typescript를 추천하는 것 같았다.
난 typescript로 하기 싫어서 javascript를 사용했다.
2-1. code 다운, 기동 확인하기
npm install -g yo generator-code
콘솔에 입력

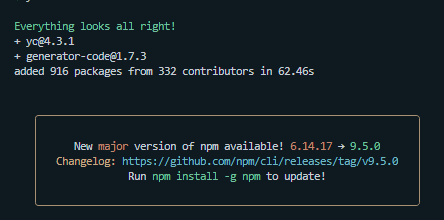
완료되었으면
yo code
콘솔에 입력

그러면 아저씨가 나온다
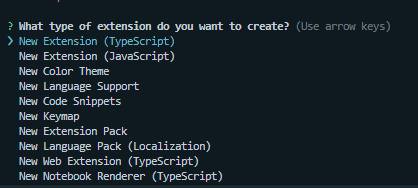
하나씩 선택해보겠다
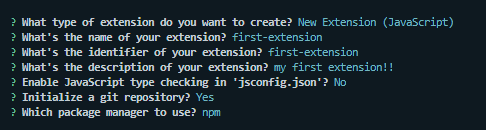
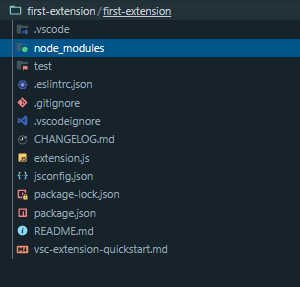
이렇게 선택하고 나면 코드가 생성된걸 확인할 수 있다.
F5를 눌러서 받은 프로젝트를 기동해보자
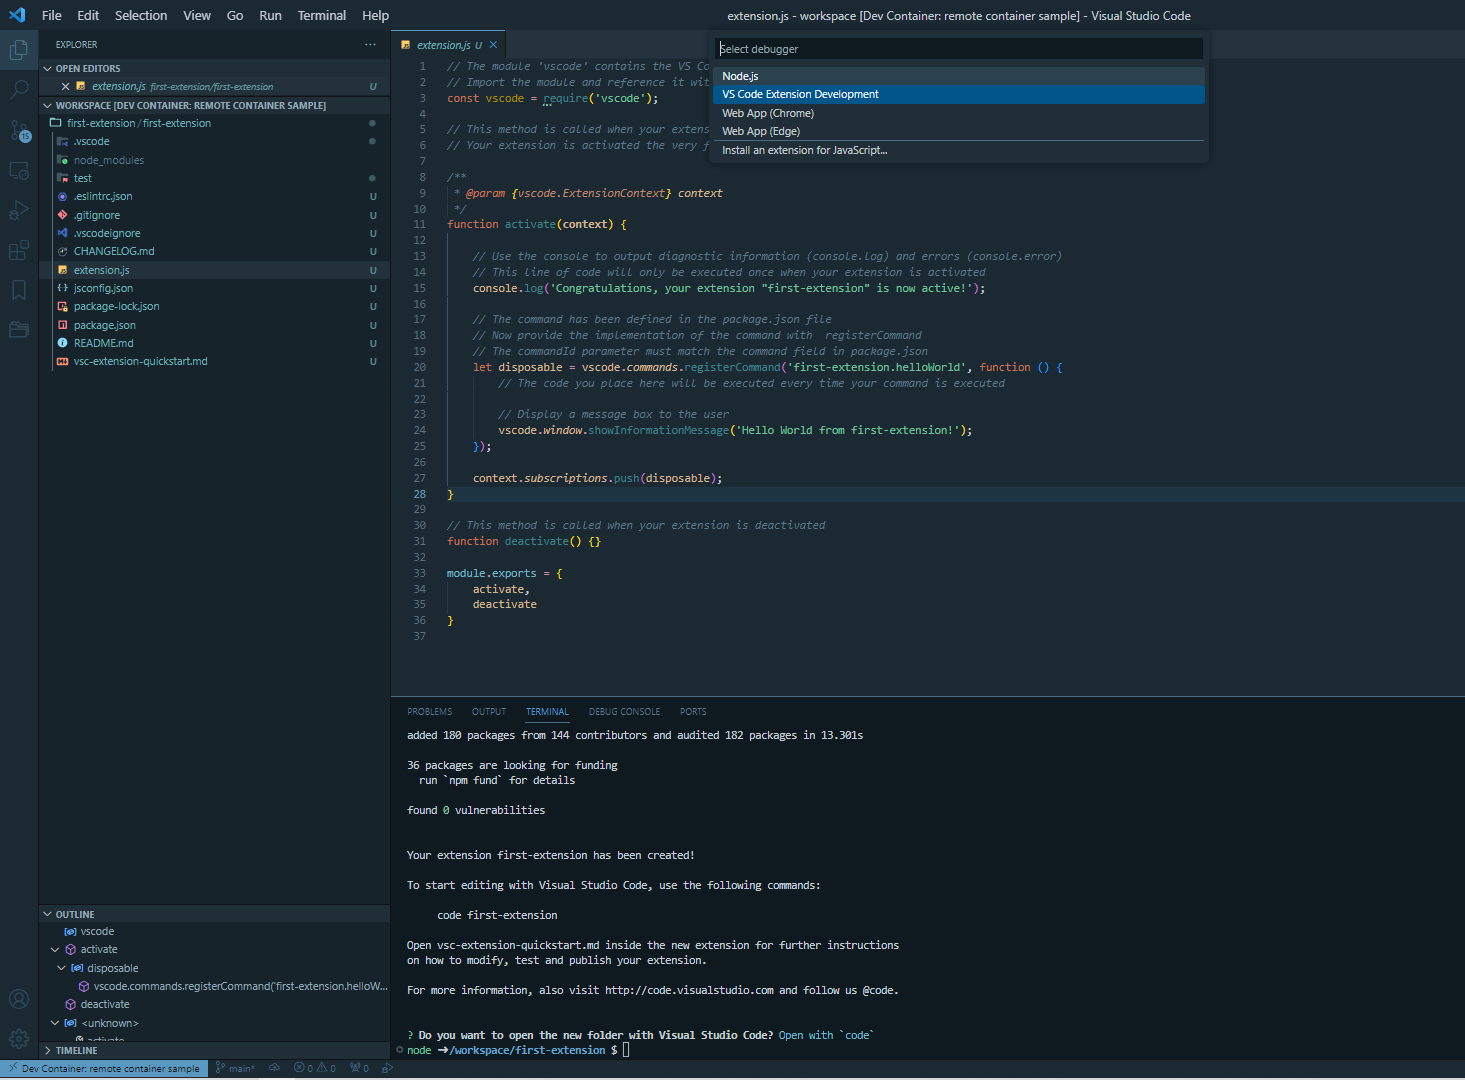
이런식으로 나오면 vscode extension development를 클릭!
그러면 창이 하나가 자동으로 더 생길것이다.
새로 열린 vscode 창에 가서 ctrl + shift + p 를 누르고 hello world를 입력하면

hello world를 클릭!
그러면 밑에 창이 뜨는 걸 확인할 수 있다.

이렇게 하면 우리는 방금 하나의 extension을 만들었다고 보면 된다.
2-2. 소스 수정하기
이제 소스코드를 확인하고 소스를 수정해보자.

우선 extension.js( 왼쪽 )와 package.json( 오른쪽 )를 확인해보자
extension.js에 밑줄그어져있는 함수 이름이 package.json에 똑같이 정의되어있는 것을 확인할 수 있다.
그리고 package.json에 title을 보면 아까 우리가 검색했던 이름 Hello World인 것도 확인할 수 있다.
일단 이정도만 알면 된다.
이번에는 내가 원하는 문장을 한번 띄워보자
나는 Hello My App!이라는 문장을 띄워보려고 한다.
extension.js
// The module 'vscode' contains the VS Code extensibility API
// Import the module and reference it with the alias vscode in your code below
const vscode = require('vscode');

// This method is called when your extension is activated
// Your extension is activated the very first time the command is executed

/**
 * @param {vscode.ExtensionContext} context
 */
function activate(context) {

	// Use the console to output diagnostic information (console.log) and errors (console.error)
	// This line of code will only be executed once when your extension is activated
	console.log('Congratulations, your extension "first-extension" is now active!');

	// The command has been defined in the package.json file
	// Now provide the implementation of the command with  registerCommand
	// The commandId parameter must match the command field in package.json
	let disposable = vscode.commands.registerCommand('first-extension.helloWorld', function () {
		// The code you place here will be executed every time your command is executed

		// Display a message box to the user
		vscode.window.showInformationMessage('Hello World from first-extension!');
	});

	context.subscriptions.push(disposable);

	let disposable1 = vscode.commands.registerCommand('first-extension.helloMyApp', function () {
		// The code you place here will be executed every time your command is executed

		// Display a message box to the user
		vscode.window.showInformationMessage('Hello My App!');
	});

	context.subscriptions.push(disposable1);
}

// This method is called when your extension is deactivated
function deactivate() {}

module.exports = {
	activate,
	deactivate
}
새로운 함수를 추가해보자.
이름은 helloMyApp으로 설정했다.
package.json
{
  "name": "first-extension",
  "displayName": "first-extension",
  "description": "my first extension!!",
  "version": "0.0.1",
  "engines": {
    "vscode": "^1.75.0"
  },
  "categories": [
    "Other"
  ],
  "activationEvents": [
    "onCommand:first-extension.helloWorld"
  ],
  "main": "./extension.js",
  "contributes": {
    "commands": [
      {
        "command": "first-extension.helloWorld",
        "title": "Hello World"
      },
      {
        "command": "first-extension.helloMyApp",
        "title": "My App Title"
      }
    ]
  },
  "scripts": {
    "lint": "eslint .",
    "pretest": "npm run lint",
    "test": "node ./test/runTest.js"
  },
  "devDependencies": {
    "@types/vscode": "^1.75.0",
    "@types/glob": "^8.0.1",
    "@types/mocha": "^10.0.1",
    "@types/node": "16.x",
    "eslint": "^8.33.0",
    "glob": "^8.1.0",
    "mocha": "^10.1.0",
    "typescript": "^4.9.4",
    "@vscode/test-electron": "^2.2.2"
  }
}
command도 추가해보자
title은 My App Title로 설정했다.
이제 저장하고 F5 버튼을 눌러서 검색해보자

설정한 타이틀이 나오는 걸 확인할 수 있다.
타이틀을 클릭하면

내가 설정한 메시지가 나오는것도 확인할 수 있다.
3. 빌드해보기
지금까지 만든 소스를 한번 빌드해서 올려보자.
3-1. dev.azure 회원가입하기
Azure DevOps Services | Microsoft Azure
Plan smarter, collaborate better, and ship faster with Azure DevOps Services, formerly known as Visual Studio Team Services. Get agile tools, CI/CD, and more.
azure.microsoft.com
우선 올리기 전에 회원가입이 필요하다.
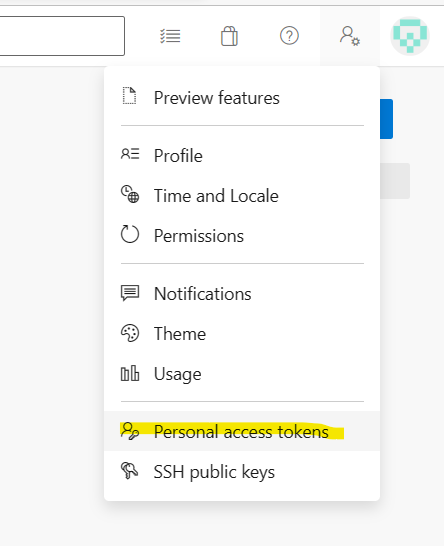
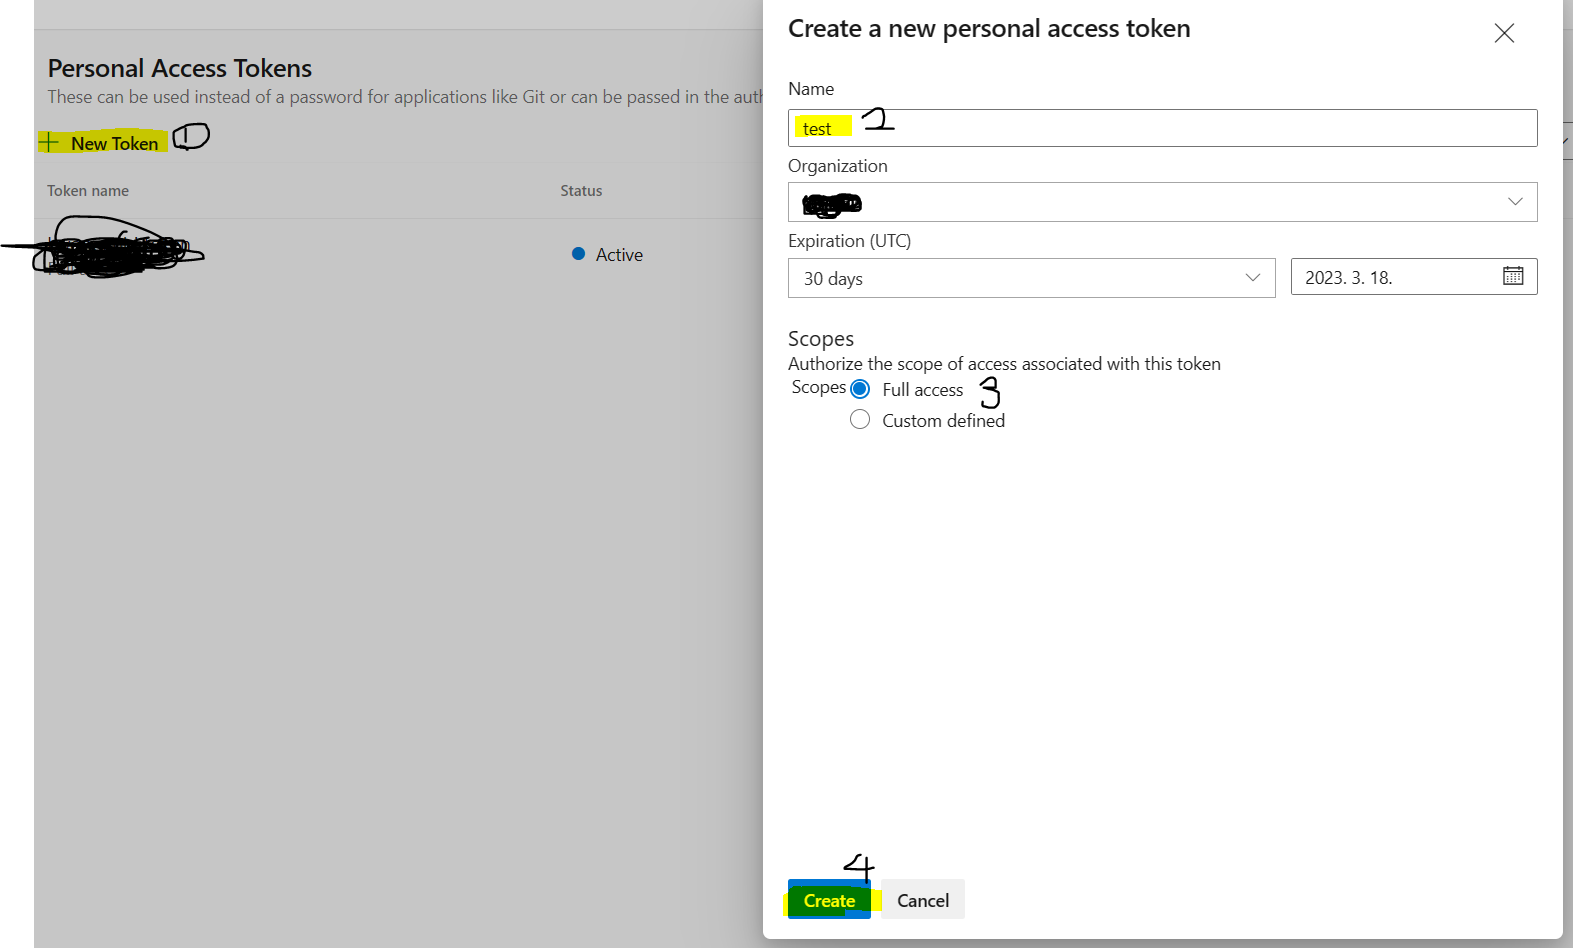
3-2. access token 만들기
회원가입이 끝났으면 로그인을 하고 access token을 만들자
토큰 이름은 test로 해서 만들어보려고 한다.
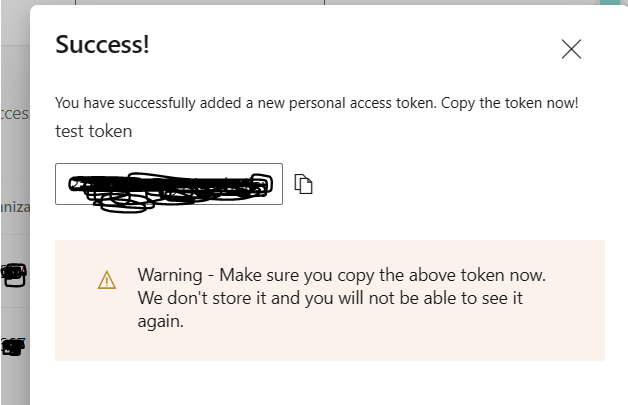
만들었을때 나오는 토큰은 다시 확인이 불가능하기때문에 복사해서 다른곳에 보관해둬야한다.
3-3. 빌드하기
이제 모든 준비가 끝났다.
소스코드로 가서 커맨드 입력
npm install -g vsce

다시 dev.azure페이지로 돌아가서 내 이름을 한번 확인하자
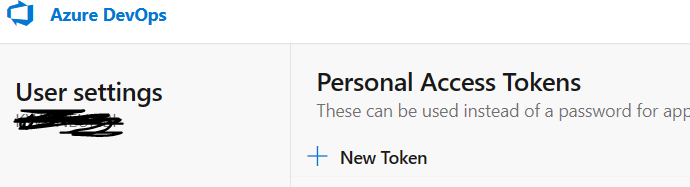
user settings 밑에 써 있는게 내 이름이다.
이름을 확인한 뒤에 커맨드를 입력하자
vsce login {{ user settings 밑에 써 있는게 내 이름 }}
그러면 액세스 토큰을 입력하라는 창이 나온다

아까 복사해 둔 토큰을 입력하자

성공했다.
3-4. 빌드용 파일 만들기
vsce package
빌드할때 필요한 파일을 만드는 커맨드이다. 입력하자
이 커맨드는 package.json이 있는 곳에서 입력해야 한다.
그렇지 않으면 나처럼 에러가 난다.

package.json이 있는 곳으로 가서 다시 커맨드를 입력하면 또 에러가 난다.

이거는 readme.md 파일이 package.json에 설정되어 있지 않아서 나는 에러이다.
사실 빌드를 할 때는 package.json에 여러 설정을 입맛대로 할 수 있다.
그러나 지금은 처음이니까 일단 대충하고 넘어가자
만약 제대로 설정하고 싶다면 밑의 링크를 참고해서 package.json을 설정할 수 있다.
https://code.visualstudio.com/api/references/extension-manifest
Extension Manifest
At the core of Visual Studio Code's extensibility model is an extension (plug-in) manifest file where your extension declares its extension type(s), activation rules, and runtime resources.
code.visualstudio.com
"readme": "./README.md",
"publisher" : "my_name"
일단 package.json 맨 밑에 readme를 추가해주자.
그리고 publisher에는 아까 위에서 적었던 내 이름을 적어주자
그리고 name, displayName을 변경해주자. 변경해주지않으면 에러가 난다.
둘 다 내 이름-first-extension 으로 설정해주자.
ex) 내 이름이 test라고 하면 -> test-first-extension
그리고 readme.md파일을 수정하려고 한다.
# first-extension README

my first-extension!

## Release Notes

Users appreciate release notes as you update your extension.

### 0.0.0

Initial release of ...
참고로 readme.md파일은 내가 만든 extension에 대한 설명을 적는 부분이다.
지금은 예시라 대충 적었지만 실제로는 제대로 적어주는 게 좋다.
이렇게 readme.md파일까지 수정한 뒤에 다시 커맨드를 입력하자

커맨드 입력 후 전부 y를 선택해주자

성공했다.
3-5. 빌드하기
이제 진짜로 빌드해보자
vsce publish
커맨드 입력!

나머지 질문들에는 전부 y 입력!

이렇게 나왔으면 성공이다.
4. 빌드된 내 extension 확인하기
이제 조금 기다렸다가 vscode extension에 내가 아까 설정했던 package.json의 name을 검색해보자
아까 나왔던 hub url이나 extension url을 검색했을때 404페이지가 나오면 조금 더 기다려보자
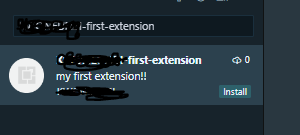
이렇게 나왔으면 인스톨 받아보자
ctrl + shift + p 를 누르고 My App Title를 입력하면

메시지가 나오는 걸 확인할 수 있다
'programing > infra' 카테고리의 다른 글
| [ network ] secure, httponly 에 대해서 (0) | 2023.07.13 |
|---|---|
| [ devcontainer ] devcontainer.json 이해하기 (0) | 2023.02.12 |
| [ vscode devcontainer ] devcontainer로 python 사용해보기 (0) | 2023.01.31 |


댓글